I. Love. Hummus.
I mean, it really is the perfect food. Such a vehicle for a multitude of flavors yet equally delicious plain. I could eat buckets of the stuff.
But oh the fat! Typically there are 5 grams of fat per 1 ounce of hummus. By the way, most store-bought tubs of hummus say that 1 ounce/2 tablespoons is a serving. Who are they kidding? So, I set out to make a lighter version.
Water. Who knew? I have always made hummus by blending olive oil into the mixture as it whirled through the blender. But I recently came across a recipe using water instead. I’m still using tahini so there is still some fat involved… but not nearly as much as when using oil (most store-bought hummus has soybean oil in it – even worse!).
I used my Instant Pot to cook the dried chickpeas. You can certainly use canned chickpeas but there is definitely a distinct difference in taste. And you can control your salt levels better. If you don’t have an Instant Pot (you really should get one) you can always cook them stovetop. But you’ll need to soak them overnight and cook for a good hour to an hour and a half on the stove. With the Instant Pot, you just set it and forget it!
Ingredients
1 lb of dried chickpeas
3/4 cup tahini
3-4 cloves of garlic
2 bay leaves
2 tablespoons of freshly squeezed lemon juice
2 teaspoons of kosher sea salt – divided
2 cups water (reserved from cooking liquid)
1/4 tsp of ground Aleppo pepper (or paprika if preferred)
1 tablespoon of good olive oil for garnishing (optional)
Preparation
Rinse chickpeas thoroughly and add to the Instant Pot (IP). Cover with water about 2 inches above the chickpeas. It should be a 3:1 ratio – water to beans. Add bay leaves, garlic and 1 teaspoon of salt.
Set the IP for manual 40 minutes on high and plan to let it do a natural pressure release (NPR) for about 20 minutes. Now walk away and enjoy yourself for the next hour!
Ready? Set? Blend!
After about 20 minutes of NPR, if your IP’s little button has dropped, just flick the pressure release open to release any additional pressure. Once all is clear and the button drops you can remove the lid. Let the chickpeas cool for about 20 minutes. Then strain, reserving at least 2 cups of the cooking liquid. Be sure to remove the bay leaves and transfer chickpeas and garlic to a blender or food processor.
Add the lemon juice, tahini, and salt. And if you love garlic like me, throw one more raw clove in there for good measure. Add 1 cup of the reserved water, close lid and begin blender on high. Let the machine go for a good couple of minutes, adding water as needed for consistency. If the mixture is too thick it won’t puree smooth and will look lumpy and grainy. Once blended to your preferred consistency – taste and add salt if needed.
UPDATE: A friend recommended that I use the reserved chickpea cooking liquid (also known as aquafaba) but honestly, I like the texture better just using plain water. The aquafaba made the hummus almost too light and airy and I really liked it with a little more substance. Try it both ways and you choose!
The Perfect Bite
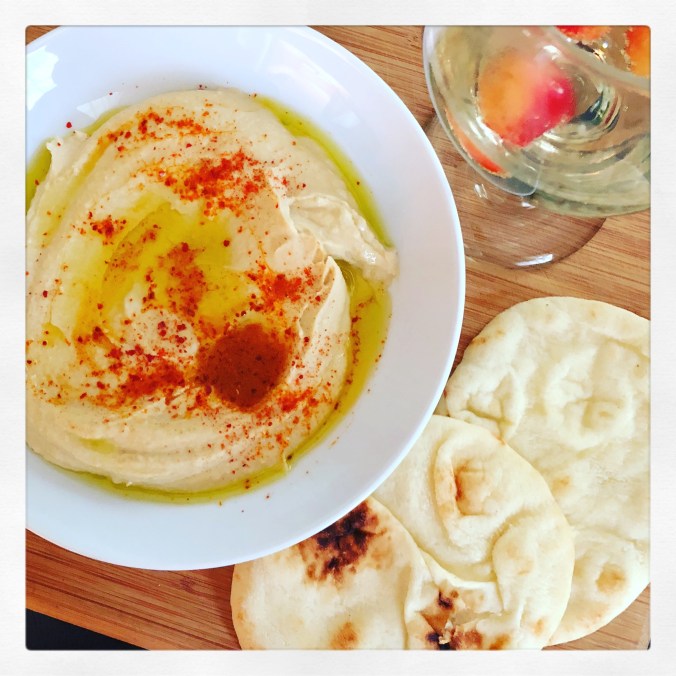
This hummus is best served at room temp or even better when it’s still a little warm from being freshly made. Serve in a shallow bowl, drizzle with olive oil, and sprinkle with the Aleppo pepper (or paprika if that’s what you’re using).
My favorite dipping vehicle for this is my homemade naan but you can use crackers or veggies, whatever you like. Also, experiment with other toppings. I love an olive tapenade, or roasted red bell peppers, or caramelized onions. The options are endless!
The Perfect Health
Did you know that because hummus contains chickpeas, olive oil and sesame seeds (tahini) it is not only a great source of protein it is filled with anti-inflammatory properties? You can read more here.

