Loaded Cauliflower Soup – Instant Pot


Image borrowed from ChewNibbleNosh until I can take one.

It’s finally soup weather after a long summer that started in April and has lasted through mid-October. So I grabbed my Instant Pot and was simply inspired just by the veggies I had handy.

INGREDIENTS

1 head cauliflower (broken into chunks)

2 poblano peppers (stem/seeds removed)

1 med sized sweet onion

1 leek stalk (white/light green parts)

2-3 cloves of garlic

3 fresh bay leaves (2 if dried)

4-5 fresh twigs of thyme (1 tsp if dried)

4-5 cups chicken stock (I used homemade)

½ cup crème fraiche (or cream cheese)

½ cup of half & half (or heavy cream)

4 strips of bacon

Grated cheddar, swiss or gruyere for topping

S&P to taste

TIME TO COOK

  • Turn Instant Pot to sauté and cook bacon until crisp (keep an eye on it – it cooked up way faster than I thought it would)
  • Remove bacon and set aside to use as crumbly topping later
  • Cut poblanos, onion, leek and garlic into 1” chunks and sauté in the bacon fat until semi tender
  • Pour in 4 cups chicken stock and deglaze the bottom with a wood spoon
  • Add cauliflower – you may need to add more stock if it doesn’t cover all the veg
  • Add thyme and bay leaves

Close the lid and set it on high pressure for 10 minutes. It will take a good 10-15 minutes to come to pressure. After the timer goes off let it decompress for 15 minutes and then do a quick release.

Remove the thyme twigs (leaves will have fallen off). Don’t worry about the bay leaves – they will blend right up.

Using an immersion blender blend until smooth.

Stir in the Crème Fraiche and half & half.

S&P to taste

Serve topped with grated cheese and bacon crumbles.

THE PERFECT BITE

I probably don’t even need to say this but the perfect bite would be to dip a piece of warm, crusty sourdough in the soup. Be sure to get some of the bacon and cheese toppings!

THE PERFECT HEALTH

Cruciferous vegetables, like cauliflower, are unique because they contain sulfur compounds called glucosinolates which, research shows, possess inflammation-reducing and cancer-fighting properties. Read more here.

Advertisement

Cheesy Asparagus Tart


15741038_10154143389889109_7973727600606227231_n

After all the filling holiday meals I decided to go vegetarian the week between Christmas and New Year’s. So l was looking for some creative ideas, as well as a way to clean out the freezer and unused veggies… I came up with this (Inspired by Carla Hall’s Acorn Squash Tart). It took all of five minutes to assemble and 30 minutes to bake – and I guarantee you everyone will ohh and ahh. I posted a photo on social media (because yes, I’m that girl) and my notifications blew up!

Continue reading

Pico de Gallo


imageAs I mentioned in a previous post, I recently discovered a little gem of a Mexican market and I have since been frequenting their produce section. Yesterday I walked out with 3 bags of produce including a large pinapple and only spent about $6.00. Ole!

I don’t know about you but for me pico de gallo just screams summer!  Fresh tomatoes, onions, jalapenos, lime juice and cilantro. I want to put it on everything! Not only is it tasty and fresh – but it looks beautiful and makes everything much more appealing. You eat with your eyes first, I always say. So, yes… presentation can be everything. 🙂

Continue reading

Garden Vegetable Pasta Bake


This is one of my favorite go-to meals, especially if unexpected company stops by… which happens frequently at my house. If your pantry is regularly stocked with an assortment of dried pastas and a few fresh garden vegetables (or even better – you have a vegetable garden in your yard!) you can whip this up on the spot… an hour’s time max!

Yields: 4-6 main course servings / 8-10 side dish servings

Ingredients
1 lb Fusilli or Rotini noodles (uncooked – I use Barilla Plus)
1/2 cup Vegan Parmesan
1 medium zucchini squash
1 medium yellow squash
1 red bell pepper
1 green bell pepper
1 cup asparagus tips
1 small sweet onion
1 medium red tomato (seeded – rind only)
1 tablespoon of minced garlic
1 pinch each of what I call The Italian Big 5 (dried): thyme, basil, sage, oregano, rosemary
1.5 tablespoon kosher salt (divided)
1 teaspoon pepper as needed
2-3 tablespoons cup extra virgin olive oil
1/4 cup dry white wine (you can you veggie stock if you prefer)
2 tablespoons vegan butter

Preparation
Preheat oven to 400 degrees.

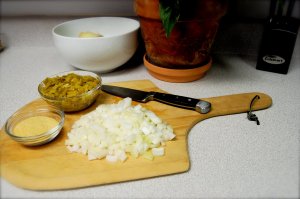
This is where your veggie chopping skills come in. I’m going to list how I chop my vegetables for this dish, but change it up to your own preference!
Zucchini – trim ends and then chop whole zucchini into three 1.5″-2″ rounds. Then take each round and quarter length-wise.
Yellow Squash – slice into 1/8″ dials. If the squash is fairly fat at the end (more than 1.5″) cut dials in half. The goal is bite-size.
Red & Green Bell Peppers – I cut them julienne. Which is a fancy word for skinny strips. Simply trim top and bottom off pepper and discard. Core and remove seeds and spines. Then slices in 1/4″ slivers about 1.5″ long.
Asparagus – I use just the tips because often the center can be a little woody if not cooked long enough. I cut the tips off about 2″ in. Then I reserve the remainder of the stalk for making soups or purees.
Sweet Onion – peel and dice finely… this should be for flavor and not something you want bite-size.
Garlic – same as the onion above.
Tomato – Slice in half and core out seeds and spines. We just want the fleshy part. Cut into 1″ chunks.

Ready To Cook?
Put a large pot of water on medium heat. Drizzle olive oil and add a tablespoon of salt to the water. I use a good amount of salt when cooking pasta… I’ve heard your water should taste like the ocean when you’re done. Infusing your pasta water with salt is better than adding salt to your meal later.

Once your water comes to a boil add your pasta and continue cooking until it’s just shy of al dente.  Remember, it’s going to cook a little more in the oven so we don’t want to overdo it. I prefer to use the fasilli or rotini noodles because the corkscrew shape holds the seasonings best… but feel free to use whatever your favorite pasta is – I’ve used to bowtie with this as well, which makes for a festive looking dish.

Using as cast iron skillet (or any nonstick), pour in 2-3 tablespoons of olive oil. While bringing it to a medium heat toss in The Italian Big 5 (dried thyme, basil, sage, oregano, rosemary). Once your oil is ready (it sizzles with a drop of water), gently add in your onion and garlic first. Stir well so that the dried herbs are worked through the oil, onions and garlic. Saute for 3 minutes then slowly add the veggies in this order (based on cooking time): Peppers, asparagus, zucchini, squash. Reserve the tomato, which won’t be added until ready to bake. Pour the 1/4 cup of white wine over veggies and continue sauteing for 5-6 minutes or until the zucchini has become tender and can easily be stabbed with a fork.

Drain pasta and transfer to a large baking dish (a lasagna dish works best). Add diced tomatoes. Then pour all the contents from your skillet over the pasta including olive oil/wine reduction that’s happened in the pan while sauteing. This is going to be the sauce. TIP: If your pan has become too dry while sauteing, you may have overcooked your veggies. Just add more olive oil and a splash of white wine (or veggie stock) and de-glaze the bottom of your pan. Add that to your pasta-veggie mix.

Immediately add 2 tablespoons of Vegan margarine so it can melt. Add half of your Vegan Parmesan cheese and mix thoroughly until everything is coated and you can see that the herbs are distributed evenly.

Taste your dish to see if additional salt and pepper is needed. TIP: Don’t assume it needs salt – salted pasta may have added plenty. Always taste your food before seasoning!

Sprinkle top with remaining Parmesan and bake uncovered on middle rack for 20 minutes (or until cheese starts to brown at edges).

TIP: If making extra to freeze for later, do not bake the portion you want freeze. Freeze after it’s cooled. Should last in freezer up to a month.

The Perfect Bite
This is one of my favorite kind of dishes to get a perfect bite from. I love stacking my fork with a twirly little noodle, a juicy piece of sausage, a buttery bite of zucchini and sweet sliver of red pepper. Oh, my mouth is watering just thinking about it! I love the nutty Parmesan and lightness of this invisible sauce.

The Perfect Pairing
This is a great summer dish so I prefer to pair it with a chilled glass of wine. Now, I’ve long since been a rosé snob. Pink wine? Really? My mind immediately goes to that giant box of Almaden Pink Blush Chablis that sits warm on the edge of my mom’s kitchen counter. Sorry Mom, but really?

However, rosé has come a long way… and I’m starting to warm up to them… well, at least when they’re chilled (again Mom, really?). Try pairing this dish with this French Rosé Note Bleue Cotôs De Provence Rosé 2009 – it’s sweet and earthy. A perfect compliment to the buttery pasta and veggies and peppery sausage. Served chilled, about 47 degrees.

The Perfect Health
Using Barilla Plus, reduces carbs and adds protein to any meal.  It’s made from legumes such as Chickpeas and Lentils as well as Egg Whites, Spelt, Barley, Flaxseed, Oat Fiber, and Oats.  Be sure check the box for cooking instructions – Barilla Plus can take longer to boil. Unlike many wheat or whole grain pastas that taste a little, well, cardboardy. This one is delicious! And I’ve found it holds up better in soups (as in, doesn’t swell and get mushy).  Read more here about its nutritional value.

Butternut Squash Lasagna


It’s a misnomer that butternut squash are just a Winter vegetable. Here in Middle Tennessee we have big beautiful squash year long… especially if you get them from your local Farmer’s Market. Granted, there’s a larger abundance of them in the Winter – but you can still easily find them now.

This recipe is made with a butternut squash puree and a nutmeg & basil rue. Sound a little complicated? Only slightly… but the results are ridiculously tasty and you can make a large batch and freeze the remaining. I’ve also included sweet Italian sausage in in this but you can make it vegetarian-friendly if you prefer.

Ingredients

1 tablespoon olive oil
1 (1 1/2 to 2-pound) butternut squash
1 lb sweet Italian sausage (usually found in links)
Salt and freshly ground black pepper
1/2 cup water
3 amaretti cookies, crumbled (optional of you can’t find)
1/4 cup butter
1/4 cup all-purpose flour
3 1/2 cups whole milk
Pinch nutmeg
3/4 cup (lightly packed) fresh basil leaves
12 no-boil lasagna noodles
2 1/2 cups shredded whole-milk mozzarella cheese
1/3 cup grated Parmesan

The Rue

Melt the butter in a heavy medium-size saucepan over medium heat. Add the flour and whisk for 1 minute. Gradually whisk in the milk. Bring to a boil over medium-high heat. Reduce the heat to medium and simmer until the sauce thickens slightly, whisking often, about 5 minutes. Whisk in the nutmeg. Cool slightly. Transfer half of the sauce to a blender*. Add the basil and blend until smooth. Return the basil sauce to the remaining sauce in the pan and stir to blend. This is your basil-nutmeg rue. Season the rue with salt and pepper, to taste.

The Squash Puree

Cut squash in half lengthwise and scoop out seeds, then quarter if squash is large. Coat in olive oil and place flesh side down on cookie sheet. Roast on top rack of oven at 425ountil tender… roughly 45-50 minutes. Be sure to use a cookie tray with at least a 1/2 inch lip as squash will give off a lot of water.

When squash is done, scoop flesh from peel and put in food processor. Add crumbled amaretti cookies and a pinch of salt. Puree until smooth. TIP: When blending hot liquids – remove liquid from the heat and allow to cool for at least 5 minutes. Transfer liquid to a blender or food processor and fill it no more than halfway. If using a blender, release one corner of the lid. This prevents the vacuum effect that creates heat explosions. Place a towel over the top of the machine, pulse a few times then process on high speed until smooth.

Ready To Cook?
Position the rack in the center of the oven and preheat to 375 degrees F.

*Saute and brown sausage in a skillet. Break up into 1/2″ pieces.  Drain and set aside.

Lightly butter a 13 by 9 by 2-inch glass baking dish. Spread 3/4 cup of the sauce over the prepared baking dish. Arrange 3 lasagna noodles on the bottom of the pan. Spread 1/3 of the squash puree over the noodles. Sprinkle with 1/2 cup of mozzarella cheese. Drizzle 1/2 cup of rue over the noodles. Repeat layering 3 more times. *Scatter sausage on second layer and cover with the mozzarella.

Tightly cover the baking dish with foil and bake the lasagna for 40 minutes then remove and uncover. Sprinkle the remaining mozzarella and Parmesan cheeses over the lasagna. Continue baking uncovered until the sauce bubbles and the top is golden, 15 minutes longer. To firm up, let the lasagna stand for at least 20 minutes before serving.

The Perfect Pairing

It’s a sultry summer – try your hand at making a sangria. Sangria’s come in all types and flavors – check out this great site filled with Sangria recipes.

The Perfect Health

Butternut squash is not just low in fat and calories, but these squash are high in Vitamins A & C and high in Potassium and dietary fiber. It’s also a great source for anti-oxidants and works toward heart and lung health. Read here for more details

Trois Fromages L’oignon Doux Tartlettes


These tasty little tartlettes are the perfect size to just pop in your mouth and enjoy the melted nutty goodness. I love appetizers and little bites… it allows you to try a plethora of options at the app table or from the “starter” menu.

Trois Fromages L’oignon Doux Tartlettes have become quite a party favorite. Last week I showed up with a plate full to an after church get-together… it was a mere 20 feet from the door to the table… but the plate was almost empty by the time I set it down. Better known as “those cheesy onion thingys” among my friends… they are simply three cheeses (Gruyere, Swiss, & Parmesan) and finely diced sweet Vidalia onions baked in tiny filo cups. Voila! You are certain to get the “wow” response from your party guests.

Ingredients
2 cups shredded swiss cheese
1 cup shredded Gruyere (Austrian is the best – but Whole Foods and Trader Joe’s has a great imported selection)
1/2 cup shredded parmigiano reggiano
3 cups diced sweet Vidalia onions
3/4 cup mayonnaise
3 pkgs pre-made Filo cups (15 count)
Ready To Cook?
Preheat oven to 425 degrees.
Add first 5 ingredients to a deep casserole dish. Stir until cheese, onions and mayo are thoroughly mixed. Cover with tin foil and bake for 45 minutes or until onions are tender. Uncover and bake for 10 more minutes… allowing cheese to brown around edges. Remove from oven and let cool for 20 minutes.
Preparation
Line cookie sheets with baking paper. (*tip: baking paper helps items cook more evenly and aids in the non-stick process). Once onion mixture has cooled, use a teaspoon and scoop spoonfuls into the filo cups. Space filo cups up on tray about 1/2 inch a part. Be careful not to place too close or they will stick together. Once cups are all filled, sprinkle the tops with shredded parmesan. Return to over on top rack and bake for 5 minutes until edges turn golden brown.
The Perfect Bite
Make sure you let these little babies cool! I’ve lost count of the times I’ve burned the roof of my mouth, unable to control my urge to pop one in my mouth right out of the oven! Once cooled, eat whole. Sure, if you’re dainty… try and take a little “bite” but you’ll end up wearing most of it.
The Perfect Pairing
This is an appetizer… so “pairing” it has no limits! They’re great for anything from a Game Day snack to an appetizer for a French inspired meal. To compliment the nuttiness of the Gruyere and Parmesan taste, pair this snack with a Yazoo Dos Perros. This toasty amber ale is a descendant of old Austrian styles known for blending German, English and chocolate malts.
Did You Know?
Onions are low in calories, zero fat or cholesterol, and when it comes to cutting Vidalias – you can almost get away without crying! *Tip: using a really sharp knife will help reduce tears when cutting onions. Also, once an onion becomes even slightly over-ripe… prepare to cry. Read more here for health aspects.

Trois Fromages L’oignon Doux Tartlettes on FoodistaTrois Fromages L’oignon Doux Tartlettes

The Blarney Burger


The Blarney Burger on FoodistaThe Blarney Burger


This Irish inspired hamburger is big and beefy and filled with rich tastes of whiskey and mustard sauce. Not to mention the earthy flavors of the crumbled bleu cheese nestled throughout the burger. Enjoy!

Ingredients
(makes 4 burgers)
Patties
2lbs ground sirloin (grass fed)
1/4 cup Irish whiskey
1 egg
2 tablespoons Worchester
1/2 cup sweet onion – diced
1 tablespoon fresh garlic
1/2 cup crumbled bleu cheese (set aside 1 tablespoon)
1/2 tsp salt
1/2 tsp pepper
2 tablespoons butter
1 cup shredded purple cabbage
4 potato bread baker’s rolls or hamburger buns
Irish Mustard Sauce
1 tablespoon cornstarch
2 teaspoons sugar
1 teaspoon dry mustard
1/2 teaspoon salt
1 cup water
1 tablespoon butter
1/4 cup vinegar
1 teaspoon horseradish
2 egg yolks, beaten

Preparation
Mix first 7 ingredients together thoroughly… then add salt & pepper. Form patties and pat together well.

Ready To Cook?

Irish Mustard Sauce
Put all ingredients in a sauce pan over medium heat. Continue whisking until smooth and thickened to consistency of pudding. This can be made ahead of time and last in the refrigerator for a week or more.

Bleu Cheese Butter-Wash
In a microwave safe bowl, add remaining tablespoon of bleu cheese crumbles and 2 tablespoons of butter and microwave for 30 seconds or until melted. Whisk well to create a bleu cheese butter-wash.

Burger
Cook meat over medium heat. Be sure to coat grill with non-stick spray. Cook about 8-10 minutes on each side depending on your doneness preference.
Brush bleu cheese butter-wash on the inside of the top & bottom buns and toast on the upper or outer edges of grill. Once rolls are lightly toasted, remove. Set meat on bottom bun and spoon Irish mustard sauce on top of meat patty. Add shredded cabbage and fold top and bottom together. And now you have The Blarney Burger!

The Perfect Bite
I think the perfect bite here… is the first bite. When all those rich ingredients explode in your mouth for the first time. But it’s a burger… so every bite will be perfect. Reserve extra mustard sauce for dipping your burger. I could drink that stuff!

The Perfect Pairing
This wouldn’t be an Irish burger unless you paired it with potatoes. Bobby Flay claims to make the Perfect Fries. I haven’t tried them… but plan to. See the recipe on SeriousEats.com. And of course, on a nice summer’s eve… what would wash this all down better than an ice cold Killian’s Red?

The Perfect Health
When most people think of the cuisine of Ireland… you don’t normally think of cheese right away. Maybe you think beef and potatoes, or Guinness and whiskey. But cheese? Ireland has at least a half dozen cheeses to choose from… and they’re not just cheddar. Read here for a list of their hard to find cheeses.

Make My Own Cheese? What? Ricotta from Scratch


It’s an amazing thing to make your own cheese. It makes me feel like I’m really making something… not just opening a package or a can… but making food. It’s a thing of wonder.

Also… I was surprised at how absolutely simple this is – and trust me… once you get this down… you will impress your friends.

The recipe below is a lower fat version of ricotta… which means it yields less volume than the full fat version. But it will make about 2.5-3 cups. Be sure to plan on using it right away. It will only last (in the fridge) for a few days because it isn’t packed full of preservatives like your store brand… and you will certainly taste the difference! It’s really hard for me to buy it off the shelf now. TIP: The fresher the milk the longer the shelf life of the cheese. Keep in air tight container.


Ingredients
1 Gal 2% milk
5 cups low-fat buttermilk
3/4 tsp of fine sea salt

Equipment Needed
Large soup pot
cheese cloth (4-5 layers)
candy thermometer

Preparations
Pour both milks into stock pot and turn to medium heat. Continue cooking until it reaches 170 degrees. Should be 15-20 minutes. gently stir every 5 minutes or so. Be careful not to stir too vigorously or curds will not form.

When the milks reach 170 degrees, curds will have formed at the top. Using a large slotted spoon, gently remove curds (aka milk solids) and place into a cheese cloth-covered strainer and bowl. Let cheese drain in bowl for about 5 minutes. Then, taking the 4 corners of the cloth and bringing them together, rubber band or tie them up… and hang from kitchen faucet. Let drain about 15 minutes. TIP: Don’t toss that whey (the leftover liquids after scooping out the curds)! It is packed with protein – great for smoothies and cooking oatmeal.  You can also cook starches with it (rice, polenta, potatoes). And try watering your tomato plants or other planted veggies and herbs – they will grow like crazy!)

Carefully open the cheese cloth and scrap the fresh ricotta into a mixing bowl. It will be more textured than you’re used to seeing, if you normally have store bought. It should have the consistency of cottage cheese. It will firm up more in the fridge.

Gently stir the sea salt in until throughly mixed. Taste and add more if necessary.

Voila! You have ricotta cheese! Congratulations…

The Perfect Bite
We tasted it straight out of the bowl… while it was still warm… and salty… and tangy… and sweet… and it was probably our favorite thing ever.

The Perfect Pairing
My friend Michele (who acted as Sous Chef on this week’s project) helped me think of all kinds of things to pair this fresh-goodness with. We mixed it with a little homemade salsa and scooped it on a chip. Yep… Delish! We spread the ricotta mousse we’d made for the Zucchini Flutes recipe on a cracker – heaven! We talked about putting it on crustinis and topping with pickled onions or peppers or a tapenade. Can’t wait to try that! Let us know what you come up with… and enjoy!

Did You Know?
Research shows whey protein from dairy foods helps muscle recovery after a bout of exercise. And an easy found source of whey protein can be found in ricotta cheese. More info here.
Ricotta, 1/2 cup (124g) (part skim milk)
Calories: 171
Protein: 14g
Carbohydrate: 6.4g
Total Fat: 10g

Spicy Mac & Cheese


This is not your Mama’s macaroni & cheese… but it is a definite crowd pleaser!

I love comfort food… I mean, who doesn’t? It evokes warm memories of home and family and a simpler time… which is why we crave it on rainy, cold days and when life throws us a curve ball.

I love to eat this on its own as a meal, but it’s also great paired with my Drunken Country Ribs… I’ll post that recipe at a later date.

Ingredients
1 pkg Creamette jumbo elbow macaroni
1 cup shredded sharp cheddar
1 cup shredded Mexican blend
1/2 cup  shredded Swiss or Jarlsburg cheese
4 tablespoons all-purpose flour
4 cup whole milk
5 tablespoons butter
2 tsps of salt
1 tsp pepper
Cholula Original hot sauce (or whatever your favorite is – this is one of mine)
salt & pepper to taste
1 sm can Ortega Diced Green Chilies (if you like it really spicy you can use their diced jalapeños instead)
1 sm sweet onion – diced
1/2 cup Panko (Japanese bread crumbs – they’re made from bread after the crust is removed, which gives them a light airy texture. If you can’t find Panko, Corn Bread Crumbs are great)

Preparation

Sauté diced onion in 2 tablespoons butter until translucent. Don’t overcook, they’ll be cooking longer in the oven.

Boil macaroni until tender, drain and put into shallow baking dish (glass or ceramic cake pan works best). While noodles are boiling you can make your bechamel sauce.  In a medium saucepan, heat butter over medium-low heat until melted.  Add the flour and stir until smooth.  Over medium heat, cook until the mixture turns a light, golden sandy color, about 6 to 7 minutes. Meanwhile, heat the milk in a separate pan until just about to boil. Add the hot milk to the butter mixture 1 cup at a time, whisking continuously until very smooth. Bring to a boil. Cook 10 minutes, stirring constantly, then remove from heat. Once removed from heat, slowly add the grated cheeses and continue stirring. NOTE: If you add the cheese while still on the heat it will curdle up and that when you get a grainy gritty texture. You want a smooth, cheesy bechamel! Once all cheese is incorporated, season with salt and pepper.

Fold in bechamel sauce and green chilies and stir until all noodles are covered and ingredients are thoroughly mixed.
Add more salt and pepper if needed and Cholula Hot Sauce to *taste.
*I always take a taste a spoonful before baking to make sure it’s spicy enough or to see if it needs more salt or pepper.

Ready To Cook?
*Sprinkle Panko across the top until evenly, but not completely covered. 
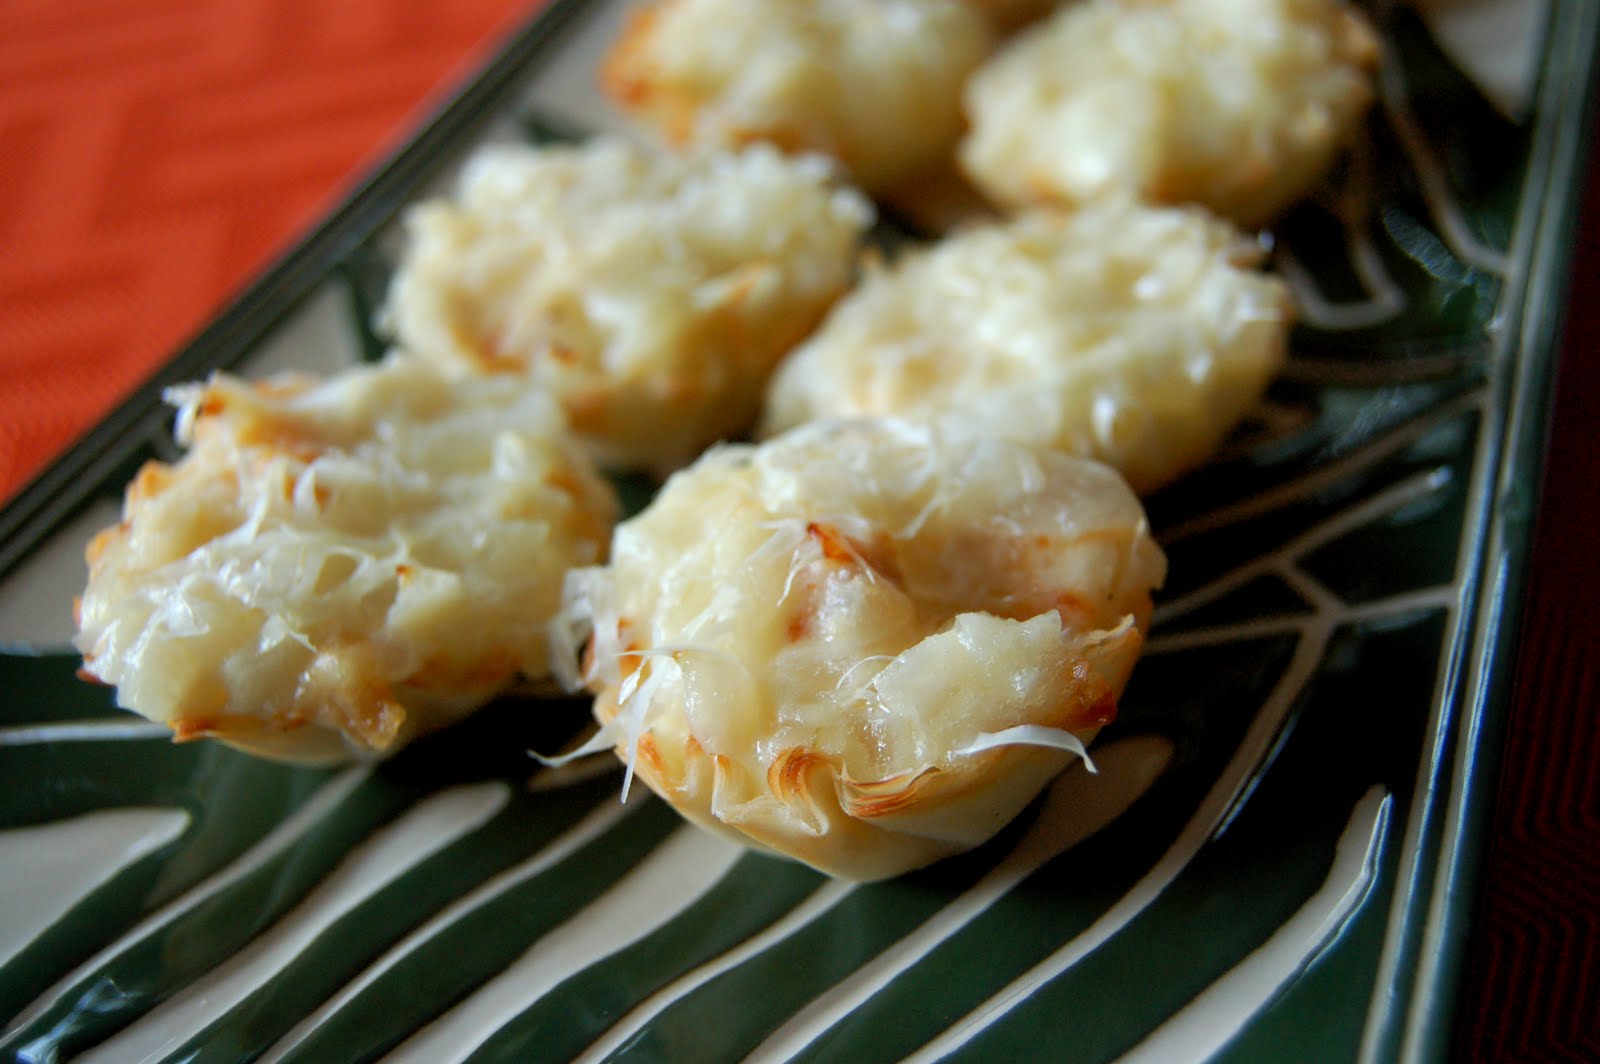
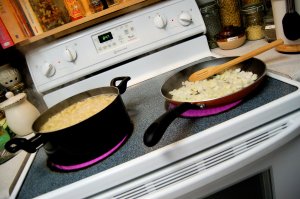
Bake at 375º for 20 minutes or until cheese is slightly brown & crunchy around edges (you know this is the best part!)

*For a more golden crunchy topping… sprinkle a few drops of olive oil in a bowl and toss panko crumbs until evenly (but lightly) coated. Then sprinkle on mac & cheese.

The Perfect Bite
Who are we kidding? Every bite of this is a perfect bite!

The Perfect Pairing
With its zesty Mexican flavors the perfect beverage for this dish is an ice cold bottle of Negra Modelo.

Did You Know? You can reduce the amount of tears you shed while cutting onions if you use a really sharp knife and a cold onion. A dull knife used on an over-ripe room temp onion will make you cry a river of tears. I always use sweet onions because they’re less tear-inducing than yellow or white onions. Also, for a little more complicated but cry-proof solution… check out this video.