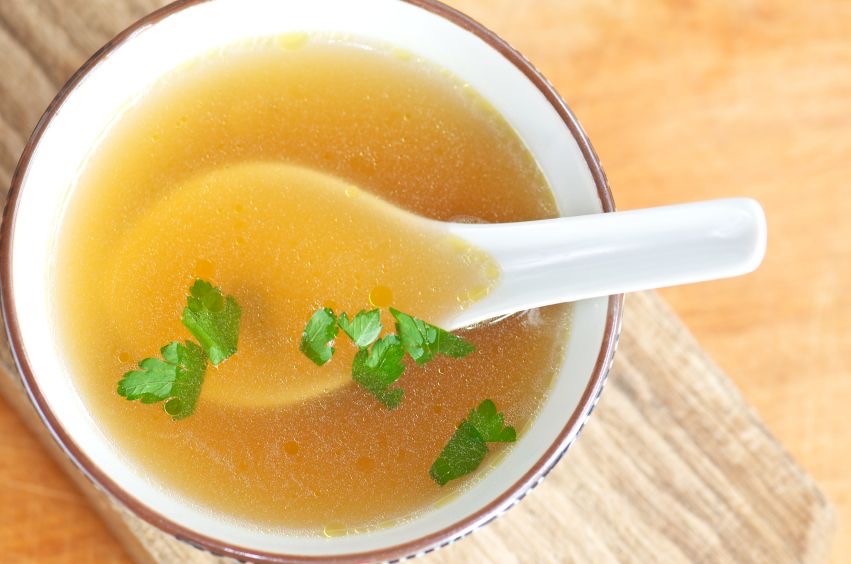
White Bean Chicken Chili


The minute the weather drops below 70° I start craving chili. And this is one of my favorites. The key to making this extra special (I even had a co-worker cuss when he tried it!) is using my garlic broth as your base. This recipe is for the stovetop but can be adapted for the slow cookers or Instant Pot.

INGREDIENTS

  • 1 1/2 pounds boneless, skinless chicken cubed or shredded if using pre-cooked
  • 2 cups garlic broth (or use plain chicken stock if you must)
  • 1 whole medium sweet onion, chopped
  • 3/4 teaspoon garlic powder (omit if using the garlic broth)
  • 2 tablespoons olive oil
  • 1 can Great Northern Beans, drained and rinse
  • 1 can white cannellini beans, drained and rinsed
  • 1 can white chili beans not drained or rinsed
  • 2 cans (4 oz) chopped green chilies (sub 1 can of jalapeños if you like it spicier)
  • 1 1/4 teaspoon Kosher salt
  • 1 1/2 teaspoons dried Mexican oregano
  • 1 teaspoon ground cumin
  • 1/2 teaspoon black pepper
  • 1/4 teaspoon cayenne pepper
  • 1/2 cup sour cream
  • 1/2 cup half & half or heavy cream
  • Shredded cheddar cheese, for serving (optional)
  • a handful of the tortilla chips crumbs from the bottom of the bag (optional)

READY TO COOK?

Heat oil in a large soup pot. Sauté chicken, onion and 1/4 tsp of salt until chicken is no longer pink. If you are using a store bought rotisserie (which I often do!) just sauté onion until soft and translucent.

Add beans, broth, chilis, and seasonings (everything but the dairy). Bring to a boil. Reduce heat and simmer uncovered for 30 minutes. Remove from heat and stir in sour cream and half & half. Serve garnished with cheese and tortilla chip crumbles, if desired.

THE PERFECT BITE

Obviously the perfect bite would be to have a spoonful of everything on it – but I also like to use a big tortilla chip as my spoon!

THE PERFECT HEALTH

To reduce the fat or omit dairy altogether – reserve half of the can of the Great Northern Beans and puree in the blender with half of a can of the broth or stock. Pour into the pot at the end and stir to thicken the chili. Your chili will not be as white as what’s pictured here but it will be creamy and dairy-free!

Homemade Chicken Stock in the Instant Pot


So, just what is the difference between stock and broth? According to Food & Wine broth is something you sip and stock is what you cook with. Stock is typically made from bones with added aromatics (i.e., carrots, celery, onion, garlic and assorted herbs). Broth is typically made using stock and then adding additional flavors to be enjoyed for sipping or a base for soup. For example, I make my favorite garlic broth (it’s literally simmering on the stove as I type this) using this stock recipe I’m about to share with you for the base.

For this recipe I use either the carcass of a chicken I’ve roasted myself, a rotisserie chicken the store cooked for me or raw chicken wings (the large whole ones). The roasted and rotisserie chicken bones are going to bring a richer flavor but are pricier than the wings. But just use whatever you have or can get!

Regardless of what version of chicken you use, the flavor comes from the skin and bones. if using a cooked carcass be sure to pick off all the meat and use it for something else. We are cooking this for a long time and it will be mush and not really tasty. If using raw wings, throw the whole thing in there. Are usually keep raw wings in the freezer when I want to make a quick no first batch of stock and don’t have time to cook a whole chicken.

Ingredients (measurements are for a 6qt Instant Pot and yields about 5-6 qts)

  • 1 whole roasted or rotisserie chicken carcass with skin (remove meat), or 3-4 whole raw chicken wings.
  • 2-3 celery sticks cut in half and washed – include leaves if they have them
  • 2-3 unpeeled carrots washed and cut in half
  • 1 large sweet onion with peel left on (this helps give the stock a beautiful golden color). Cut in quarters.
  • 3-4 whole garlic cloves. No need to peel but be sure to smash so flavor can release.
  • 10 whole peppercorns
  • 2-3 bay leaves
  • 1 teaspoon of salt (add more to taste when finished cooking)
  • 2 sprigs of fresh or 1 teaspoon of dry thyme
  • 2 sprigs of fresh or 1 teaspoon of dry oregano
  • 2 sprigs of fresh or 1 teaspoon of dry rosemary
  • 2 sprigs of fresh or 1 teaspoon of dry sage
  • 6 cups of water or fill to an inch over contents. Do not exceed fill line on Instant Pot insert.

Ready to Cook?

Throw all ingredients into the pot and cover with the water. Close the lid of your Instant Pot and set to seal if not automatic. Set to pressure cook on high for 2.5 hours. This will really get all the good flavor and gelatin out of the skin and bones. Let naturally release for 30 minutes. It will take about 20 minutes for your pot to come to pressure so total cook time will be about 3:20. You can let it go longer with no problem – but I wouldn’t cook it less or you will miss out on all the depth of flavor a long pressure cook will bring.

Once your natural release is done, carefully remove the lid. I use a large ladle to remove the bones and veg from the pot. These have served their purpose and really have no life left in them so they can be tossed or composted. Thanks bones and veg! I turn off the warmer and let it cool for 30 minutes to avoid burning myself – which is inevitable. Once it’s cooled some, strain the liquid through a fine mesh strainer or cheesecloth with a large bowl underneath. I store my stock in gallon-size ball jars that I got on Amazon. You can use a fat separator if you want, or just put in the fridge and the fat will rise to the top and solidify and you can scrape off. If you’re not watching your fat intake then skip this part!

PRO TIP: I use this quite often so I typically do not have the need to freeze it. However, it does freeze well. Freeze in single portion freezer Ziploc bags to easily grab the amount you need. Should last in the refrigerator in an airtight container for a good 2 weeks and in the freezer for 3 months.

THE PERFECT PAIRING

I personally love to just sip this broth by itself. But it makes an incredible base for some home pho, or chicken and dumplings or just about any comfort soup that’s calling your name. I also use one cup of it as the liquid when cooking chicken breasts or pork shoulder in the Instant Pot. I also use it when making rice in the IP – adds delicious flavor!

THE PERFECT HEALTH

Bone broth is all the health rage and pressure cooking this for at least the 2.5 hours I suggest gets all the gelatinous goodness out of the bones – which is great for reducing inflammation and good for gut health.

Miso Soup with Soba Noodles and Roasted Chicken


photo 3

If you’re like me soba noodle always sound a little intimidating. Do they require special handling? Are they high maintenance? The answer is yes… and no.  Super simple to cook – 3 to 4 minutes tops. And the only special handling is to remember that they continue soaking up liquid… so best to store leftovers dry.  Honestly, they are best freshly made but they cook so quickly it will just take minutes to prepare next time you need them! And since they’re lower in carbs and calories than regular pasta noodles… these buckwheat gems are worth it!

Continue reading

Sriracha-Pomegranate Chicken Wings


useGenerally, I try to post only my original recipes on here… but this one is too good not to share! Plus, every time I make these people insist on having the recipe “right away.” So, courtesy of one of my favorite Food Network stars, Aarti Sequeira of the cooking show Aarti Paarti, I present to you, Sriracha-Pomegranate Wings! As Aarti likes to say, “Serve these and people will write poetry about you.”

I have made these for several different occasions and without fail I get the same reaction, “These are the best wings I’ve ever tasted.” And often, when running into folks weeks after the event, I hear, “I can’t stop thinking about those wings!” I’m perfectly content bragging like this because, well, it’s Aarti’s recipe and she gets all the credit.

So get ready – Super Bowl is right around the corner. So start shopping for some of these ingredients, unless you’re like me and your pantry is already stocked with Indian spices. 🙂

(HINT: You can usually find pomegranate molasses at gourmet stores, better supermarkets, Indian and Middle Eastern stores. If you can’t, don’t fret. Grab yourself a bottle of pure pomegranate juice, pour it into a saucepan and boil it down until it reaches a loose syrup consistency. Keep an eye on it so that it doesn’t burn. There you have it. Pomegranate molasses. Sriracha is available in the international aisle of your supermarket — it usually has a little rooster on the label, and a bright green top. It either comes in a jar (more chunky) or a squeeze bottle (pureed). If you can’t find it, or don’t like it, any hot sauce or Tabasco will do. A little chipotle Tabasco would be awesome!)

Ingredients
2lb chicken wings (about 12)

Rub:
4 tsp coriander seeds
2 tsp cracked black peppercorns
8 green cardamom pods, cracked open, seeds removed, husks discarded (if you can’t find these, use 2 tsp cardamom powder)
2 tsp cumin seeds
4 tsp dry mustard
2 tsp kosher salt

Sauce:
4 tsp grapeseed oil
4 cloves garlic, minced
4 tsp reserved spice mixture
2 tsp Sriracha (Thai chili sauce; use more if you like it spicy!)
2 tbsp Pomegranate molasses
2 tbsp minced or torn mint leaves
2 tsp lemon juice
2 tbsp cold butter

IMG_1669Preparation
Pat chicken wings dry with a paper towel; don’t skip this step! This will both help the rub adhere, and ensure crispy skin.

Place a small but heavy skillet (I like using a small cast iron one) over medium heat, and add coriander seeds, cracked black peppercorns and cardamom seeds. Toast, shaking pan often for about 1 minute.

Add cumin seeds and toast another minute until seeds have darkened, are fragrant and faintly smoking. Immediately transfer to a pestle and mortar or a spice grinder, and grind to a fine powder.

Grab a bowl large enough to hold all the wings (or giant zip lock if you must). Pour ground spice mixture into the bowl, and add the mustard and the salt (and the cardamom powder if you’re using this instead of seeds). Whisk to combine. Reserve 4 tsp of this mixture for the sauce (see below). *I would encourage making a double batch of this rub, as you will want to keep extra handy for other meals. It’s amazing on beef or shrimp.

Drop wings into the large bowl or zip lock; toss to coat the wings well. Let those puppies sit for about an hour.

Ready To Cook?
About 15 minutes before you’re ready to bake, preheat your oven to 375°F.

Line a baking sheet with foil. Place a wire rack over it, and grease with cooking spray (or brush with grapeseed oil oil). Place the wings on the rack, at an even distance from each other. Pop into the oven for about 45 minutes, flipping the wings over halfway through, and rotating the baking sheet for even cooking.

As the wings are roasting away, make the sauce: In a small saucepan over medium heat, warm the grapeseed oil until shimmering. Add the garlic, and cook for about 30 seconds. Then add the reserved spice blend; cook another 30 seconds. Then add Sriracha sauce, pomegranate molasses and mint leaves. Stir, and cook for about 5 minutes, before finishing with the butter and the lemon juice. Stir. Taste for seasoning and set aside off heat.

When the wings are done, toss with the sauce. Avoid the temptation to eat them all yourself.

Recipe courtesy of aartipaarti.com
Link to recipe here  (Aarti even gives me a shout out!)

The Perfect Bite
So, this might depend on whether you like the drum or the flapper. For me, the perfect bite is the chubby part of the drum. What about you?  Now, I have gone to the trouble of making a yogurt mint sauce for dipping each time, but no one really goes for it. The taste of the wings, by themselves is so profound… why mess with perfection? So just dive in.. because really, the perfect bite is every bite.. including the licking of fingers and your now numb lips.

The Perfect Pairing
Fact: Indian food is incredibly flavorful and can be quite spicy.
Fact: India pale ales are incredibly flavorful and can be quite bitter.
Fact: It’s difficult to pair beer with Indian food.
Fact: It’s difficult to pair food with IPAs.
Fact: Indian food and IPAs were made for each other, literally.

These wings are merely Indian-inspired but have many of the traditional flavors…and with the sticky sweetness of the pomegranate molasses and the earthy, smoking spice rub – an IPA is an ideal choice. That said, I’m no expert on IPA’s to recommend a good one – so if you have a favorite, feel free to suggest it in the comments!

The Perfect Health
To start off, I love these wings because they are baked and not fried. But also, studies indicate that daily consumption of pomegranate juice, about 8 ounces a day for three months or more, can help:

  • Reduce dangerous LDL-cholesterol in blood
  • Improve blood flow to the heart in patients with coronary artery disease
  • Reduce thickening of the arteries that supply blood to the brain
  • Lower the level of systolic blood pressure

See? Not only are these wing unbelievably delicious – they can save lives!

Bon apetit.
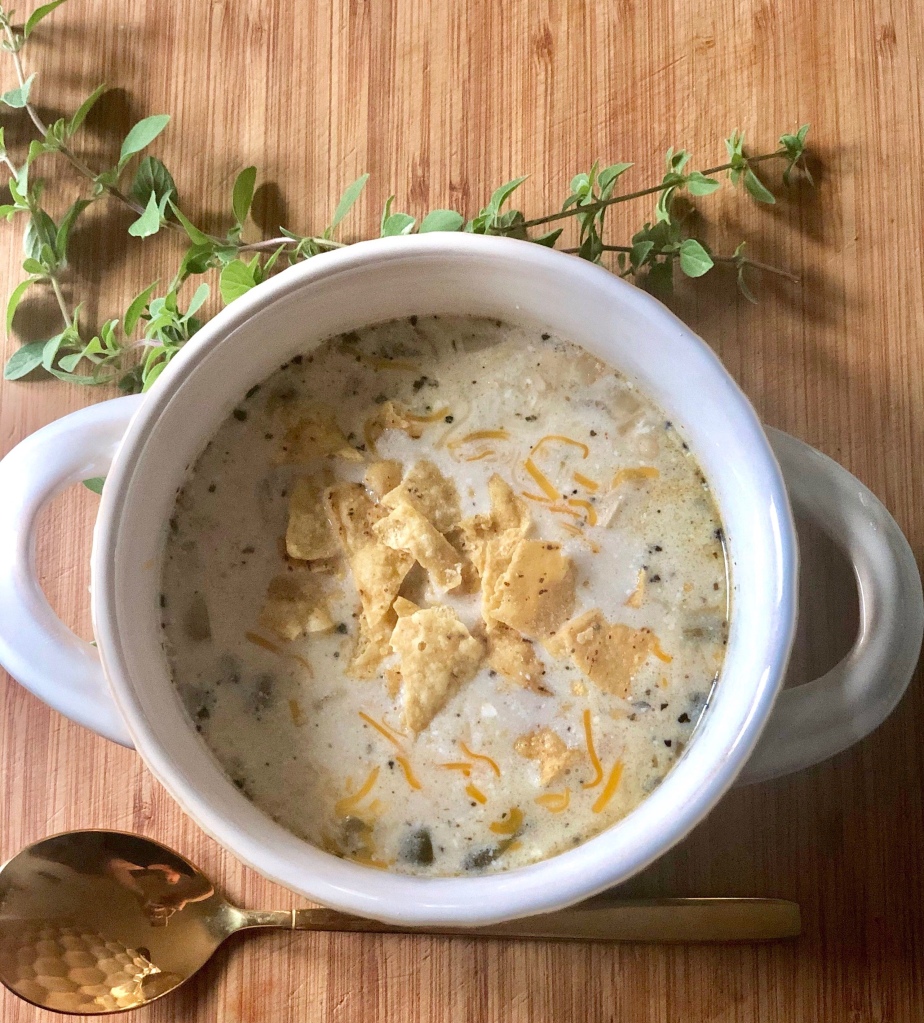
Chicken Curry with Coconut Rice


Ladies and gentlemen… for the very first time… I’m about to post a semi-homemade dish on here (*gasp*).  No offense to that Sandra Lee lady…  but it kind of goes against my principles to call something a “recipe” when it all comes from boxes and/or bottles.  Yeah, call me a food snob, I’m okay with it. I’ve learned to own it.

But I love this dish and could easily eat it every week… and I get the same response from everyone I’ve made it for (or maybe I should just say, “prepared” it for?) .   And for that reason alone, it I feels highly unfair to keep it from you all. So, at the risk of compromising my “from scratch” integrity – here goes:

Ingredients
(serves 4)
1 pound uncooked chicken tenderloins (either purchase them already cut, or defy Sandra Lee and cut your own)
1 cup cut okra (fresh is best but you can use frozen if you must – but pay attention to prep notes when using fresh)
1 cup whole green beans – fresh
1 cup sliced orange or red bell pepper – fresh
2 tablespoons Patak’s Hot Curry Paste (pictured – use mild if you are not a fan of spicy food).curry paste
2 cups coconut milk (Trader Joe’s has a light milk that’s excellent!)
2 cups water
2 cups white rice – uncooked
3 bottles Thai Yellow Curry Sauce from Trader Joe’s (Patak makes good one as well, if there’s no TJ’s nearby)

Preparation
I start with the rice… it can take awhile if not using instant:
For every 1 cup of rice use 1 cup of water and 1 cup of Light Coconut Milk
Bring water and milk to a low boil, then add rice and stir once to mix. Bring rice to a full boil for about 5 minutes, then remove from heat and cover. Let sit for 15-20 minutes until rice is tender. Fluff with a fork. It should be loose and not clumpy like sticky rice.

UPDATE: I made this recipe before I owned an Instant Pot. If you own a pressure cooker like an Instant Pot, I suggest using it instead. With the IP use half a cup of water and half a cup of coconut milk to one cup of rice and cook on high for three minutes with a natural release which should take seven or eight minutes.

Onto the curry chicken:

  • Cut okra into 3/4 inch dials. If using fresh okra you should toast them in a dry pan for a few minutes before adding to the sauce. They tend to get gummy and mushy otherwise. Toasting them firms the skin and helps them hold up better.
  • Slice bell pepper julienne -style into 2-3 inch long strips.
  • Trim your whole green beans (unless you paid the extra cash and bought them trimmed)
  • If you bought whole boneless chicken breasts, cut them into tenderloin strips.

Empty two of the bottles of curry sauce into a soup pot. Add the veggies and put on a low heat.

In a large saute pan, empty half the remaining bottle and turn to a medium heat. Stir in 1 tablespoon of the red curry paste. Add half of your chicken and saute, turning each piece until thoroughly cooked. Go ahead and cut your largest tenderloin open to check if it’s done. Be careful not to overcook or your meat will dry out. Once each piece is done (6-8 minutes depending on size of tenderloin), use tongs and place chicken in soup pot with veggies.  The sauce in your saute pan will have reduced, so add remaining sauce in bottle as well as the remaining tablespoon of curry paste and continue cooking the rest of your chicken. Once all chicken is done and in your soup pot, pour the leftover sauce and bits from your saute pan into the mixture. That adds some amazing yumminess.

Leave your soup pot on a low heat until a slow bubble starts and your veggies are tender (but not mushy).

Your rice should be done by now. For a more refined presentation (as pictured above), take a ramekin or an old butter cup (or something of similar size & shape) and firmly pack it with rice. Flip it upside down on your plate. It should leave a clean solid dome of rice. Drizzle curry sauce over the rice and neatly place a couple of chicken tenderloins and some veggies on top.

For a more rustic presentation, use shallow bowls and scoop a cup of rice with a cup of curry, chicken and veggies on top. It tastes just as good this way!

The Perfect Bite
Of course you want a perfect bite of rice, veggie and chicken together all on your fork. But also make sure you have enough sauce so that you can mix it with whatever leftover rice you have. The curry and rice alone is delicious!

The Perfect Pairing
If you’d like an appetizer for the entree trying pairing it with my Curry Hummus and Naan Bread.Or you can just make the Naan and use it to scoop up the curry goodness. For a beverage, try pairing this with Gnarly Head Zinfandel Old Vine 2007. Lots of plum and berry flavors with a hearty finish. The subtle sweetness will balance well with the savory chicken & veggies, but the strong peppery finish will hold its own against the power of the curry. In my opinion, this wine is best with served with food… its flavors don’t come alive well on their own.

Did You Know?
Okra is native to the Old World tropics (West Africa) and has become established in the wild in some New World tropical areas. It is believed that okra first reached the New World during the days of slave trafficking. The species apparently originated in the Ethiopian Highlands, though the manner of distribution from there is undocumented. Read more here.

The Backyard Salad


I love a big salad. A leafy bowl of green goodness, garnished with bright fresh veggies, crunchy nuts, earthy avocado chunks, tangy crumbled cheese and of course , topped with my favorite part of the salad: Good Seasons All Natural Italian Dressing.

This recipe is quite simple and you may be thinking, “Deb, why do I need a recipe for salad? I mean, come on… it’s just salad!” But this particular “recipe” is packed full of proteins (which aren’t normally found in your average side salad) and is hearty enough to be a complete meal in itself. Even for the burliest hungry-man (he may protest initially, but he’ll find himself perfectly satisfied by the time he reaches the bottom of the bowl), and it’s tasty enough for even the pickiest of kids. Also, it’s a great source of filling protein for your die-hard vegetarians. I made this for my friend Cara and I last night. She’s a self-proclaimed “Veg-Head” who was completely full after one plate.

History of the Backyard Salad Name
Kids love this salad and you’ll finally get them to eat spinach without a fuss! When my niece Katelyn was 8 years old (she’s now 11), she took one look at the salad and said, “Aunt Debbie, did you just pick these leaves off the tree in the backyard?” I simply smiled and said, “Maybe…”. She laughed and said, “Cool!” And dug right in. She calls it my Backyard Salad.

So take the challenge and tell me if you finally got your kids to eat spinach. And tell me if you’re still left hungry after polishing off a big bowl of Backyard Salad!


Ingredients

(serves 3-4)
1 large bag of baby spinach leaves (much better for you than iceberg or lighter leaf lettuces & doesn’t turn brown when air hits it)
1 large avocado
2-3 med tomatoes-on-the-vine
1 large cucumber
1 cup of croûtons (make your own by tossing cubed day old bread in olive oil, garlic and salt and bake for 8 minutes at 350 or until golden brown).
1/2 cup of roasted sliced almonds (I use Almond Accents Original when I don’t have time to roast my own)
1/4 cup of Vegan Feta


Preparation:

-Wash bagged spinach leaves and put in large bowl.
-Peel and cut cucumber lengthwise in half, then cut into 1/4″ slices.
-Cut tomatoes into 1/4 inch slices and then into quarters.
-Cut avocado in half, remove pit, then slice halves into 4 sections lengthwise. The skin will peel off much easier this way. Then cut your 8 slices into 1″ chunks. A too ripe avocado will turn into mush. Look for fruit that is semi-firm to the touch.
-Add cut veggies and remainder of ingredients to the salad and toss.
-Add 4-5 tablespoons of salad dressing and toss again. It covers a lot but add more if desired. Be careful to not add too much before tossing, or salad can end up soggy.
-Serve in large individual bowls and enjoy!

(If you reserve a handful of spinach leaves and croûtons, you can add them to your leftovers (if you have any) the next day, re-toss and it will revive your somewhat soggy salad. You probably don’t need to add any more dressing of tossed well.)

The Perfect Bite
I like to stack on my fork a piece of  avocado and tomato with a big spinach leaf… then swirl it around to pick up bits of the crumbled feta and almonds.

The Perfect Pairing
I’m not a fan of fresh fruit in my salad, though some people like to add pears, strawberries or mandarin oranges. Instead, I prefer to pair The Backyard Salad with a crisp, fruity fermented beverage. Monterey’s Bogle Chardonnay adds the perfect touch of green apple and ripe pear. All the fruit I need with this meal!


Did You Know?
A new little handy item I’ve recently discovered is the Hefty Fresh Extend zip-lock baggies. These one gallon gems literally extend the life of fruits and vegetables in the fridge. I like to stock up at the Farmer’s Market… but my fresh goods usually get tossed from rotting before I can consume them all (especially with my travel schedule). The Hefty Fresh Extend baggies have saved me from throwing away food and money.

Baked Almond Chicken Breast with Sliced Avocado


This is a very simple recipe that takes less than 30 minutes to cook… as long as you marinate the chicken the night before.

Ingredients

1-2 boneless chicken breasts
1/4 cup sliced almonds
1/2 avocado, sliced
1 pkg Good Seasons Italian Dressing
1/3 cup avocado or grapeseed oil
1/4 cup apple cider vinegar
1/2 cup water
2 fresh basil leaves, whole

The Night Before:
First, start with the Italian dressing for the marinade. I am cheating a bit since I’m using Good Seasons Italian Dressing (but it even comes with a cute little cruet in the starter kit!). All it takes is one of their magic little seasoning packets, your own cider vinegar, water, and oil… and voila! You will have a dressing that people will crave (friends are constantly asking me to “Bring that salad… you know, the one with the dressing!”). Just follow the directions on the packet. Plan to keep plenty of it in your pantry… you will find dozens of uses for it!

Okay, now put your chicken in a zip lock and add the dressing as a marinade. Zip closed and shake to make sure the dressing completely covers the chicken… then refrigerate overnight.

Ready to Cook?
Preheat oven to 425 degrees. Pour all the contents from the zip lock into the baking dish. You’ll cook the chicken in the remaining marinade. Bake uncovered on the middle rack for 20 minutes. Then remove and sprinkle with sliced almonds. Return to oven and bake for an additional 5 minutes. Some ovens may vary… but be sure not to overcook the chicken or it will dry out. But for a small to medium-sized chicken breast, 25 minutes it should still be juicy but you should not see pink in the middle of the chicken breast. If using pre-cut chicken tenderloins, reduce the total cooking time to 20 minutes.  This recipe works great on the BBQ grill, as well.

Slice half of an avocado and stack on the center of your plate. Place chicken pieces on ton and garnish with basil leaves.

The Perfect Bite:
For a mouth-watering experience, be sure to stack a cut of chicken, a slice of almond, and a piece of avocado together on your fork… and enjoy! Feel free to make appropriate noises of delight.

The Perfect Pairing:
Try a chilled glass of Bolla Pinot Grigio. It’s light and smooth and perfect for a warm Spring evening. $9-$10 a bottle.

Did You Know?
Americans drink red wine too warm and white wine too cold. If you open and set chilled white wine out at room temp for 10 minutes before serving, you will be able to taste the wine as it was meant to taste. And the opposite goes for red wine… it should be chilled for 10 minutes before serving… Read more here.